
Looking up at the night sky has always filled us with wonder. Not long ago, capturing that beauty meant buying expensive gear. Those days are gone! Your iPhone now has the power to snap amazing star photos. The tech in your pocket can reveal celestial wonders most people never see with their eyes alone
Ready to try? This guide will show you how to take stunning night sky photos with just your iPhone and a few simple tools.
Understanding iPhone Capabilities For Astrophotography
Overview Of iPhone Night Mode And Long Exposure Features
Apple changed the game when they added Night mode to iPhones. This feature kicks in when light gets low and works magic with what your camera sees. Night mode takes several shots at once and blends them. The result? Photos that show what your eyes can't see in darkness.

For the best shots, tap the Night mode icon (it looks like a moon) when it appears. You can adjust how long your iPhone captures light. Longer is often better for stars!
Want to use Night mode for star trails? Keep your phone still for the full 30 seconds. Your iPhone needs to rest on something solid for this to work well.
Differences Between iPhone 16, 16 Pro, and Earlier Models
Each new iPhone brings better night photo skills. The iPhone 16 camera takes this to new heights.
The standard iPhone 16 packs a great 48MP main camera that handles low light well. The Pro models add ProRAW support, which helps when editing star photos later.
Older iPhones (11 and up) can still take good night sky shots, but you'll notice:
- Shorter max exposure times
- Less detail in dark areas
- More noise in the final image
The leap from iPhone 12 to 16 is huge for star photos. Newer models catch more light with less noise, making stars pop against the black sky.
Limitations
Even the best iPhone has limits for star photos:
- Base models lack true optical zoom. When you zoom in on stars, you're using digital zoom, which can make photos grainy.
- You can't manually focus on stars. The iPhone tries its best to focus in the dark, but sometimes gets confused.
- Pro models add some telephoto reach, but even they struggle with distant objects like planets or star clusters.
These limits just mean we need to be smart about how we shoot. Let's look at the gear that helps.
Essential iPhone Astrophotography Gear Checklist

1. Tripod
A tripod is not optional for star photos. Even tiny movements blur stars.
Look for a tripod that:
- Holds your iPhone steady
- Adjusts to different heights
- Folds small enough to carry
- Has legs that lock firmly
Your tripod doesn't need to be fancy or expensive. Many phone tripods cost under $40 and work great. If you're looking for ideas, KraftGeek offers a few solid options that cover different needs:
- Variety Tripod – Lightweight and ultra-adjustable for uneven terrain
- Just Tap Tripod – Super quick to set up, ideal for spontaneous stargazing
- MagStand Tripod – MagSafe-compatible for snap-on mounting and streamlined setup
Remember: Without a tripod, your star photos will always look blurry, no matter what else you do right.
2. Red Flashlight
Our eyes take time to adjust to darkness. One flash of white light resets this process.
Red light lets you see without ruining your night vision. Use a red flashlight to:
- Set up your gear
- Check the settings on your phone
- Move around safely in the dark
- Read star charts or maps
- Many hikers' headlamps have a red light mode. You can also find red light apps for your phone.
3. Power Bank
Cold nights and long exposures drain iPhone batteries fast. Nothing ends a shoot quicker than a dead phone.
Bring a power bank with:
- At least 5,000mAh capacity
- Fast charging support
- Multiple ports if you have other devices
A great example is the KraftGeek PowerShutter Power Bank, designed with mobile creators in mind. It’s compact, fast-charging, and has enough juice to last an entire night under the stars.
4. Remote Shutter or Timer
Touching your iPhone to take a photo causes shake. Even small movements ruin star shots.
Options to avoid this:
- Use your Apple Watch as a remote shutter
- Buy a Bluetooth remote (under $20)
- Set the iPhone's timer to 3 or 10 seconds
The timer works well and costs nothing. Just tap and step back to let the phone settle before it takes the shot.
5. Lens Attachments
Want to get closer to the stars? Add-on lenses can help base model iPhones.
Popular options:
- Telephoto lenses for more zoom
- Wide-angle lenses for capturing more sky
- Macro lenses for moon detail
Quality varies widely. Avoid cheap lenses that create blurry edges or color problems. Brands like Moment make good-quality lens attachments.
Best iOS Apps For Night Sky Photography

Native Camera App
The app that came with your iPhone works great for star photos. Recent iOS updates add:
- Full Night mode control
- RAW photo capture on newer models
- Exposure time adjustment up to 30 seconds
To use these features:
- Open the Camera app
- Make sure Night mode is on (moon icon)
- Tap the Night mode icon to adjust exposure time
- For RAW files, turn on ProRAW in Settings (if your model supports it)
The native app is often the best choice for beginners. It's simple, fast, and already on your phone.
NightCap Camera
NightCap Camera is built just for night photos. It adds:
- Star mode for brighter stars
- Star trails mode for light streaks
- Aurora mode for northern lights
- Meteor mode to catch shooting stars
The app uses AI to help find the right settings. This makes it easier to get good results your first time out.
Cost: $2.99 one-time purchase
ProCam 8
ProCam 8 brings DSLR-like control to your iPhone. You get:
- Full manual mode
- ISO control (light sensitivity)
- White balance settings
- Custom shutter speeds
- Focus peaking to help get stars sharp
This app works best if you know a bit about photography basics. The extra controls let you fine-tune your shots.
Cost: $7.99 with some in-app purchases
Halide
Halide is known for its clean design and pro features:
- Focus assist tools
- Exposure warnings
- RAW and ProRAW support
- Depth capture
The app makes manual controls easy to use. Its focus tools help get stars sharp when auto-focus struggles.
Cost: Free to download, requires subscription
Slow Shutter Cam
Slow Shutter Cam does one thing very well: long exposures. It offers:
- Light Trail mode for star trails
- Low Light mode for night scenes
- Motion Blur for moving objects
- Exposure times up to 60 seconds
- For star trails or long star exposures, this app gives you more control than the native camera.
Cost: $1.99 one-time purchase
PhotoPills
PhotoPills is the master planning tool for night sky photos. It helps you:
- Find when the Milky Way will be visible
- Plan moon phases and positions
- Track sun and star paths
- Scout locations with augmented reality
The learning curve is steep, but no app is better for planning epic star shots.
Cost: $9.99 one-time purchase
AstroShader
After taking your photos, AstroShader helps make them shine:
- Remove light pollution tints
- Enhance star visibility
- Adjust colors and contrast
- Apply night sky effects
Think of this as your digital darkroom for star photos.
Cost: $4.99 with some in-app purchases
How To Prepare For The Perfect Shot

Location
Light pollution is the enemy of star photos. Cities cast a glow that washes out stars.
Finding dark skies:
- Drive at least 30 miles from major cities
- Look for state or national parks
- Use a dark sky map app to find spots
- Higher elevations often have clearer air
The darker your location, the more stars will show in your photos. What looks like a few dozen stars to your eye can become thousands in a photo from a dark site.
Weather
Clear skies matter, but there's more to check:
- Cloud cover (even thin clouds block stars)
- Humidity (causes haze)
- Air quality (smoke or pollution reduces clarity)
- Wind (makes your tripod shake)
- Apps like Clear Outside or Weather Underground show these details for stargazers.
If the forecast shows clear skies but high humidity, expect less than perfect conditions. Dry air shows stars best.
Timing
The moon is beautiful but its light drowns out stars. For best results:
- Shoot during a new moon (no visible moon)
- If the moon is up, try to work with it in frame
- Plan shoots for the hours before moonrise or after moonset
- Exception: If you want to photograph the moon itself, choose a full or nearly full moon.
The first and last quarters of each lunar month offer a mix - some dark skies and some moonlight.
Composition
The night sky offers many targets. Popular choices include:
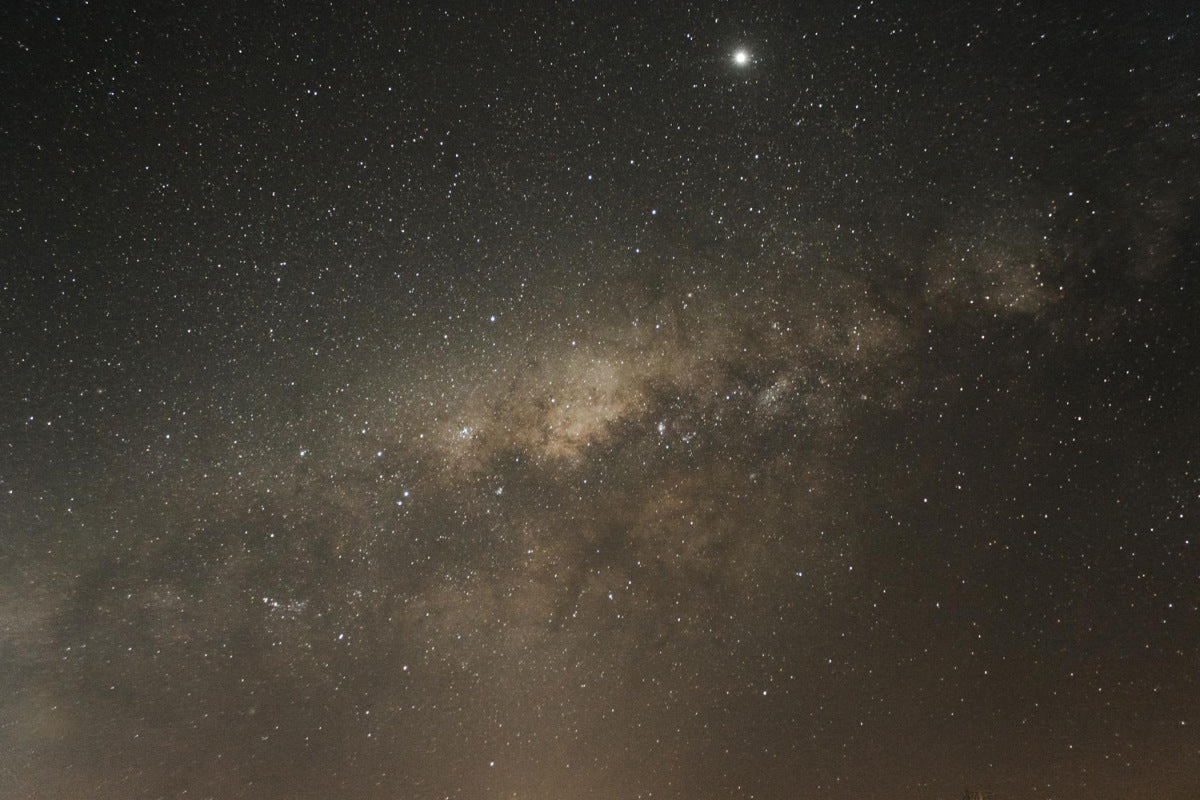
- The Milky Way core (visible summer through fall)
- Orion Nebula (visible winter)
- The Pleiades star cluster (visible fall/winter)
- Jupiter and Saturn (check an app for visibility)
- Meteor showers (check annual calendars)
- Frame these with earth elements like trees, mountains, or buildings to create depth.
Remember: Wide shots work better than zooming in, unless you have advanced gear.
How To Shoot The Stars With an iPhone

Prepare Your iPhone
Before heading out:
- Clean your lens with a soft cloth
- Check your storage space
- Update your iOS and apps
- Turn on Low Power Mode to save battery
- Pack your gear (tripod, power bank, etc.)
At your location:
- Mount your iPhone on the tripod
- Turn off auto-lock in Settings
- Turn on Airplane Mode to avoid distractions
- Disable any notifications
Adjust Night Mode Settings
Once set up:
- Open your camera app
- Make sure Night mode is active (moon icon)
- Tap the moon icon to see exposure options
- Set to "Max" for star photos (10-30 seconds)
- Tap the sky to focus, or focus on a distant object
Pro tip: If focus is hard to get, try focusing on a bright star or distant light, then recompose.
Take the Shot
Time to capture:
- Use a timer or remote to avoid touching the phone
- Stay still during the exposure
- Review your shot and adjust as needed
- Try several exposures with small setting changes
- Be patient - some trial and error is normal
Take multiple shots. Night skies can vary, and you'll want options when editing later.
Explore Further
After basic shots:
- Try different angles and compositions
- Include foreground elements for depth
- Experiment with apps like NightCap for star trails
- Try shooting through different seasons to catch various constellations
With more experience, try more advanced techniques like stacking multiple exposures.
How To Photograph The Moon With An iPhone

Taking good moon photos needs a different approach:
- The moon moves faster than it seems. Use shorter exposures (1-3 seconds) to keep it sharp.
- The moon is very bright. Tap on it in your camera app and drag down on the exposure slider to see details instead of a bright blob.
- Use optical zoom if you have it (Pro models). Digital zoom works too but reduces quality.
- Hold your iPhone very steady or use a tripod. Even slight movement blurs moon details.
- Try shooting the moon when it's low on the horizon. This creates interesting size illusions and lets you include landscape elements.
- To capture craters and surface details, use Night mode but with shorter exposure. Lower exposure manually by tapping and sliding. Try HDR mode to balance bright and dark areas
- Avoid lens flare by shielding your lens from other light sources.
The best moon photos often come during partial phases rather than the full moon, as the shadows along the terminator line reveal more texture.
How To Edit Your Night Sky Photos With iPhone

Editing in the Photos App
The built-in Photos app has powerful tools:
- Open your star photo and tap Edit
- Try these adjustments:
- Lower Brilliance slightly
- Increase Contrast
- Lower Highlights to reveal more stars
- Lift Shadows to bring out details
- Add Definition to make stars pop
- Use Vibrance to enhance colors
- Try the "Vivid" filter for more color
- Use the crop tool to improve composition
- Save a copy to keep your original intact
These simple edits often transform good shots into great ones.
Editing with Third-Party Apps
For more control, try these apps:
Snapseed (Free)
- Use "Curves" to enhance star visibility
- Try "White Balance" to remove light pollution color casts
- Use "Selective" tool to brighten just the stars
Lightroom Mobile (Free with subscription options)
- Adjust clarity to make stars pop
- Use dehaze to cut through atmospheric haze
- Apply noise reduction for cleaner dark areas
- Use masks to edit sky separately from ground
Afterlight ($2.99 monthly)
- Try the "Dust" and "Light Leak" effects for creative looks
- Use curves for precise control of brightness
- Apply film grain for a moody feel
Remember: Good editing enhances what you captured; it doesn't try to create what wasn't there.
Common Mistakes To Avoid

1. Overexposing the Moon
The moon is much brighter than the stars. If you're shooting both together:
- Expose for the stars and accept that the moon will be bright
- Or expose for moon detail and add stars in editing
- Try HDR mode to balance both
- If the moon is your subject, lower the exposure until you see surface details.
2. Blurry Photos from Camera Shake
Blur ruins star photos. Prevent it by:
- Using a solid tripod
- Setting a timer to avoid touching the phone
- Staying still during exposure
- Avoiding windy conditions
- Not walking near your tripod during shots
Even small movements can blur stars into streaks.
3. Over-relying on Post-Processing
Editing can't fix poor capture. Focus on:
- Getting the best raw image possible
- Using editing to enhance, not rescue
- Keeping edits subtle and natural
- Preserving the true colors of stars
No amount of editing fixes a fundamentally blurry or poorly exposed image.
4. Wrong Camera Settings
Common setting mistakes:
- Not using Night mode when needed
- Setting exposure too short to capture faint stars
- Not checking focus before shooting
- Leaving on flash (which does nothing for distant stars)
- Take time to check settings before each shot.
5. Focus Issues
Stars are hard to focus on. Try these tricks:
- Focus on the brightest star or planet
- Use manual focus in third-party apps
- Focus on a distant light or mountain
- Try the "infinity" focus setting in apps like NightCap
Take test shots and zoom in to check focus.
6. Light Pollution
City lights wash out stars. To fight this:
- Find darker locations
- Face away from cities
- Use hills or buildings to block light
- Try light pollution filters in editing
Sometimes working with light pollution creates interesting effects, but for pure star shots, darkness is best.
7. Distracting Background
Watch for things that pull attention from your stars:
- Bright lights in frame
- Overly busy foregrounds
- Unintended reflections
- Aircraft and satellite trails
Scan the entire frame before shooting.
8. Not Cleaning the Lens
A dirty lens means blurry, smudged stars. Always:
- Clean with a microfiber cloth
- Check for fingerprints
- Remove any case that obstructs the lens
- Shield from dew in humid conditions
A clean lens makes sharper stars and better colors.
Conclusion
The stars have never been more within reach. Your iPhone, with its amazing camera and the right techniques, can capture views of the cosmos that were impossible just a few years ago. Start simple. Grab a tripod, find a dark spot, and point your phone up. With each attempt, you'll learn something new and your shots will improve.
We'd love to see your results! Share your night sky shots and let us know which tips helped you most. Each shared image inspires others to look up and capture the wonder above us.